Few home projects reward the cheapest option the way pipe insulation does: insulate water pipes in the spaces that freeze first and an afternoon's work pays back every winter the house sees. Be clear about the mechanism, though: a wrap slows the escape of heat without generating any. A wrapped line in a cold crawl space freezes later than a bare one, sometimes much later, but on a long enough arctic stretch, it can still freeze. In University of Illinois Building Research Council field tests, bare pipes in an unconditioned attic began icing up when outdoor readings hit 20°F. Insulation moves that threshold down and buys you hours; it doesn't repeal physics. Plan for it to do the everyday work, and know when it needs backup.
Tools and materials
- Foam pipe sleeves: pre-slit polyethylene tubes sold in six-foot lengths at any home center. Buy the size matched to your pipe's outside diameter; a sleeve that hangs loose insulates poorly.
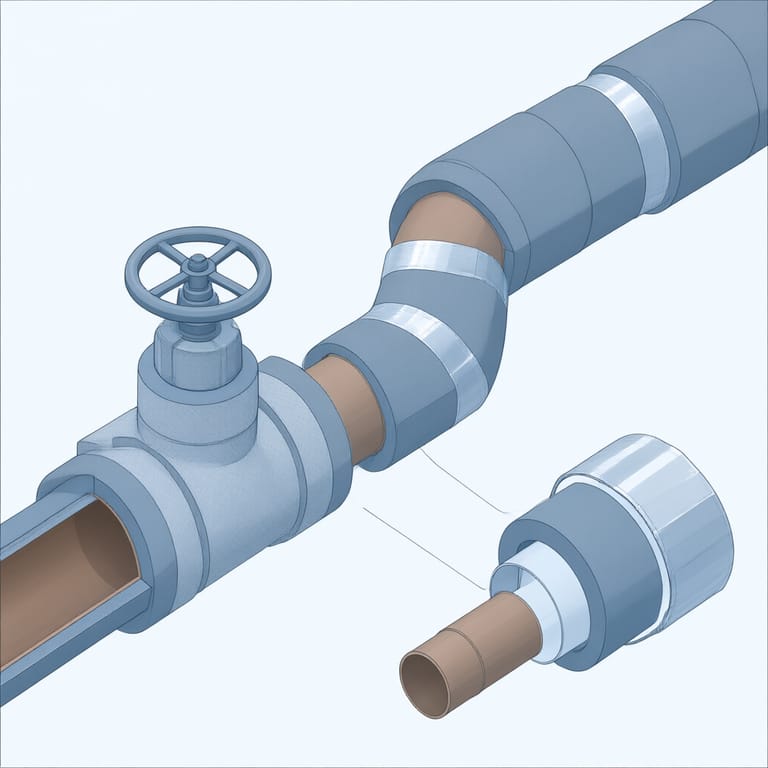
- Fiberglass pipe wrap with a vapor-barrier facing for odd shapes, valves, and tight spots where sleeves won't seat.
- PVC or foil insulation tape to seal seams and joints. Duct tape dries out and lets go within a season.
- Utility knife with fresh blades, tape measure, and a marker.
- Caulk or a can of gap-sealing foam for the holes where lines pass through exterior walls and the rim joist.
- Gloves, long sleeves, and safety glasses if you're handling fiberglass.
For a typical basement the whole materials list costs less than one professional service call, and a fraction of the $13,954 the Insurance Information Institute reports as the average water-damage-and-freezing insurance claim.
Which water pipes to insulate first
Work in order of exposure, not convenience:
- Pipes in unheated spaces: crawl spaces, garages, unfinished attics, and unconditioned basements. These freeze first and freeze hardest. Crawl spaces are their own project; see the crawl space guide for vents, skirting, and mobile-home specifics.
- Exterior-wall runs, with north-facing walls and any stretch where a draft brushes the line at the top of the list.
- Lines near the last cold spots: where the supply line enters the house, and near hose bib penetrations.
- Every other exposed run. Insulate exposed water pipes in interior basements too: lower priority for freezing, but wrapping hot-water lines also cuts the heat they waste on the way to the tap.
Hot or cold pipes? Both. Insulate cold water pipes first if you must ration materials, since they're the classic freeze victims, but hot-water pipes freeze too: they sit idle overnight just like cold ones, and the water in them cools fast. Insulate every accessible run in a cold space regardless of which side it's on. Copper, CPVC, and PEX all get the same treatment; PEX tolerates a freeze better but is not freeze-proof. More on that in our frozen PEX guide.
Choosing the insulation
| Material | Best use | Difficulty |
|---|---|---|
| Foam sleeves (polyethylene) | Long straight runs of 1/2" to 1" pipe; the workhorse | Easy |
| Self-sealing rubber sleeves | Same as foam but better cold-flex and pre-glued seams | Easy |
| Fiberglass wrap | Valves, elbows, odd diameters, tight clearances | Moderate; wear protection |
| Spray foam | Sealing air gaps around lines, never as the only covering | Easy but messy |
| Heat cable + rated insulation | Runs that freeze despite insulation | Moderate; see below |
A note on spray foam, since it comes up constantly: foaming a line into a wall cavity can help if it puts the run on the warm side of the insulation, but foam applied directly over a chronic-freeze pipe just hides it. Seal the air leaks with foam; insulate the pipe with sleeves.
Before you start
- No shutoffs needed: water and power stay on while you insulate. This is a low-risk job.
- Keep all insulation at least a few inches clear of flue pipes, water heater exhaust, and anything that gets hot. Combustible material against a flue is a fire hazard.
- Fiberglass irritates skin, eyes, and lungs: gloves, sleeves, glasses, and wash up afterward.
- If you'll be on a ladder in an attic, work with footing you trust and keep your weight on framing, not drywall.
- Fix any drip before you wrap it. Insulation over a leaking joint hides the leak until it becomes a ceiling stain.
Need a licensed plumber right now?
Call (800) 555-0173Free call, connects to a licensed local plumberLicensed plumbing partners in your area- Licensed and insured partner network
- 24/7 call routing
- Free call, no obligation
- You approve the price with the plumber directly
How to insulate water pipes, step by step
- Map and measure (20-30 minutes). Carry a flashlight and a marker through every unheated space. Tag each exposed run, note the diameter (measure across the line; 1/2" and 3/4" are the usual suspects), and total up the footage. Checkpoint: a shopping list with feet-per-diameter, plus a count of elbows and valves.
- Prep the pipe (10 minutes). Wipe runs dry and brush off dust so tape and self-sealing seams actually stick.
- Fit the sleeves (roughly an hour for an average basement). Open each sleeve along its slit, seat it over the pipe, and press the seam closed with the seam facing down. At elbows, cut 45-degree miters so the joint closes without gaps; at tees, notch the sleeve to fit. Butt sections tight against each other. Checkpoint: no bare pipe visible anywhere on the run.
- Tape every joint. Seal seams, butt joints, and miters with insulation tape. Wrap valves and irregular fittings with fiberglass wrap, but leave shutoff handles accessible. A valve you can't reach in an emergency is worse than an uninsulated one.
- Seal the cold air (20-30 minutes). Caulk or foam the gaps where pipes penetrate exterior walls, the rim joist, and the floor of unheated spaces. A draft freezes a line well before still air at the same temperature does, and these penetrations are the draft's front door. Checkpoint: hold a hand near each sealed gap on a windy day and feel no draft.
Outside runs: the wrap-only approach fails
The best way to insulate outside water pipes is to admit that insulation is only half the answer there. Any external line above the frost line spends winter in the killing zone, and in the northern tier that design depth runs 42 to 60 inches (up to 80 in northern Minnesota), per state frost-line data compiled by World Population Review. You can insulate external water pipes with outdoor-rated sleeves as the base layer, but a run that must hold water through January needs self-regulating heat cable underneath the wrap, and a hose bib needs draining rather than wrapping. Cover, cable, drain: that combination survives; foam alone does not.
Where insulation stops being enough
If a wrapped pipe sits in a space that stays below freezing for days, it will eventually lose the fight. Unprotected pipes in unheated areas typically freeze within 6-8 hours once temperatures hold at or below 20°F, per Angi's published guidance, and insulation stretches that timeline rather than eliminating it. For chronic offenders (the crawl space run that froze twice last year, the line in an uninsulated garage), add heat tape or heat cable under insulation rated for that use. If you're weighing cable against other approaches, the freeze protection comparison walks through the full decision.
When to stop and call a licensed pro
Put down the utility knife and make a call if you find corroded or actively leaking pipe, fittings that weep when touched, runs buried in walls or underground you'd have to open up, or plumbing that needs rerouting out of a freezing zone. That's repair and re-piping territory, and it's licensed work in most states. Call (800) 555-0173 and NorthBriar will connect you with licensed, insured local plumbing partners who can quote it properly. We're an independent publisher; the call is free and you pay only for work you approve with the plumber directly.
Once you insulate water pipes everywhere you can reach, the winterization hub covers the seasonal chores and cold-snap tactics that finish the job.
Need a licensed plumber right now?
Call (800) 555-0173Free call, connects to a licensed local plumberLicensed plumbing partners in your area- Licensed and insured partner network
- 24/7 call routing
- Free call, no obligation
- You approve the price with the plumber directly